
Helloooooo!
I’ve been working with vSphere with Tanzu for a while now and I’ve encountered numerous instances where Orphaned Volumes and / or Orphaned Snapshots were dangling in the environment.
Wouldn’t it be great if there was a tool to magically list all those dangling volumes? Good news! There is one! Developed by VMware:
Cloud Native Storage – Self Service Manager
This tool is installed as a Replicaset in your Tanzu Kubernetes Cluster. If you have multiple Tanzu Kubernetes Clusters (TKCs) then it’s advised to install it on your ‘Shared Services / Admin’ TKC. So that you can connect centrally other TKCs into the centrally installed CNS – Self Service Manager Solution.
It’s an API based product! Meaning in order to interact with it you have the following options:
- Using the Swagger UI
- Using any other API Request Tool like Postman, curl, …
We will be deploying it using the following settings:
- Auth Type: Basic Auth (alternative is OAUTH2)
- Ingress: Nodeport (alternative is LB)
- TLS Secured: No TLS (alternative is TLS Secured)
All the Options are explained here.
What will we be doing in this Blog Post?
- Gathering the Requirements
- Deploying CNS – Self Service Manager
- Adding a TKC
- Listing Orphaned Volumes / Snapshots
So let’s get started!
WARNING! Use different Settings for Production Usage (e.g.: Turn TLS ON, use OAUTH2 and a LoadBalancer)
Gathering the Requirements
- Start by browsing to the CNS – Self Service Manager Github page & download the Code as Zip File. Make sure to unzip it in a folder of your likings
- Once unzipped enter your vCenter IP Address & Credentials in the following file:
<cns-self-service-manager-parent-directory>/config/vc_creds.json

Example:
{
    "vc": "192.168.1.20",
    "user": "administrator@vsphere.local",
    "password": "<your-pw-here>"
} - Provide a KubeConfig file for the TKC you would like to scan Orphaned Volumes / Snapshots on.
This can be done either by executing the CNS – Self Service Manager provided script or by providing your current credentials from your kubeconfig like so:kubectl config view --raw
And copy the contents you need for your TKC; save it in:<cns-self-service-manager-parent-directory>/config/vc_kubeconfig
Example:apiVersion: v1
clusters:
- cluster:
certificate-authority-data: <ca-data>
server: https://10.10.60.32:6443
name: 10.10.60.32
contexts:
- context:
cluster: 10.10.60.32
user: wcp:10.10.60.32:administrator@vsphere.local
name: tkc-shared-services
current-context: tkc-shared-services
kind: Config
preferences: {}
users:
- name: wcp:10.10.60.32:administrator@vsphere.local
user:
token: <token> - Choose a Username and Password for accessing the CNS – Self Service Manager Swagger UI & API
Example:username: mike | password: myverysecurepassword
You’re all set!
Deploying CNS – Self Service Manager
Let’s deploy the solution!
- Make sure to connect to your TKC where you would like to host the solution
- Once connected, browse to the ‘/deploy’ folder and execute the following:
./deploy.sh cns-manager ../config/sv_kubeconfig ../config/vc_creds.json 10.10.70.54:30008 basicauth false 'mike' 'myverysecurepassword' - What does this all mean?
./deploy.sh <the-namespace> <the_kubeconfig_file> <the_vcenter_creds> <a_worker_node_ip>:<a_nodeport_port> <auth_type> <use_certificates?> <basic-auth-username> <basic-auth-password> - If you are running on a TKC which is not using PSP anymore but leveraging PSA, make sure to add the following label to the cns-manager namespace after deployment:
k edit cns-managerAdd Label: pod-security.kubernetes.io/enforce: privileged
So that it looks like this:
apiVersion: v1
kind: Namespace
metadata:
creationTimestamp: "2024-06-17T08:12:25Z"
labels:
kubernetes.io/metadata.name: cns-manager
pod-security.kubernetes.io/enforce: privileged
name: cns-manager
resourceVersion: "52025096"
uid: 9ed5b091-7ab2-4ac4-8db7-700f8ced43e2
spec:
finalizers:
- kubernetes
status:
phase: Active - We now should see Pods coming up!
k get pods -n cns-manager

NAME                           READY   STATUS    RESTARTS   AGE
cns-manager-766b66586b-x7x7n   3/3     Running   0          35m
Nice! Let’s go to the next step.
Add a TKC
Now let’s add a Tanzu Kubernetes Cluster to our CNS – Self Service Manager solution!
Before we can do this, we should obtain the ‘Kubernetes cluster id’ used by our vSphere CSI to identify the cluster. Here’s how:
- Make sure to connect to your TKC where you would like to detect Orphaned Volumes / Snapshots from
- Describe the following ConfigMap ‘pvcsi-config’:
k describe cm -n vmware-system-csi pvcsi-config - Look for the entry stating ‘tanzukubernetescluster-uid’ and copy the ID
Now let’s use the API of the CNS – Self Service Manager in order to register our TKC.
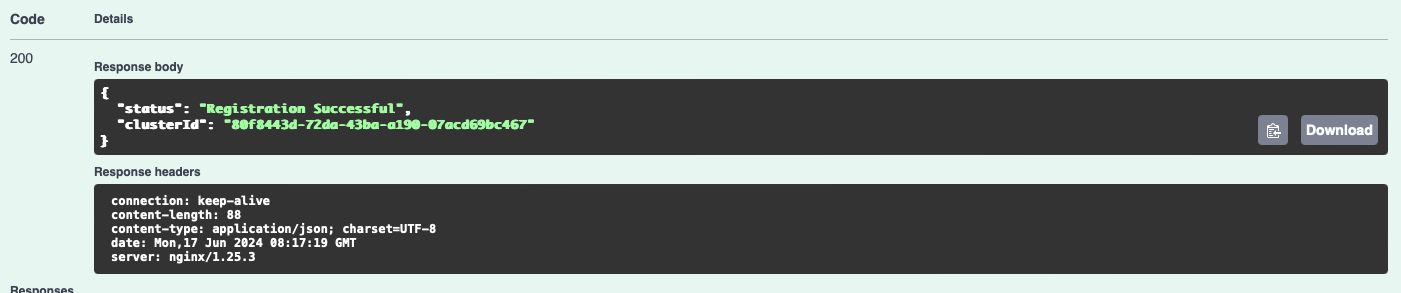
- Browse to the Swagger UI website:
http://<tkc_woker_node_or_LB_IP>:30008/ui/
(Using Postman or Curl? The Backend API Calls themselves are accessible through the ‘/1.0.0/’ suffix; example: http://<tkc_woker_node_or_LB_IP>:30008/1.0.0) - Register the Cluster by executing the ‘/registercluster’ API call and providing your Cluster ID and the KubeConfig file we generated earlier:
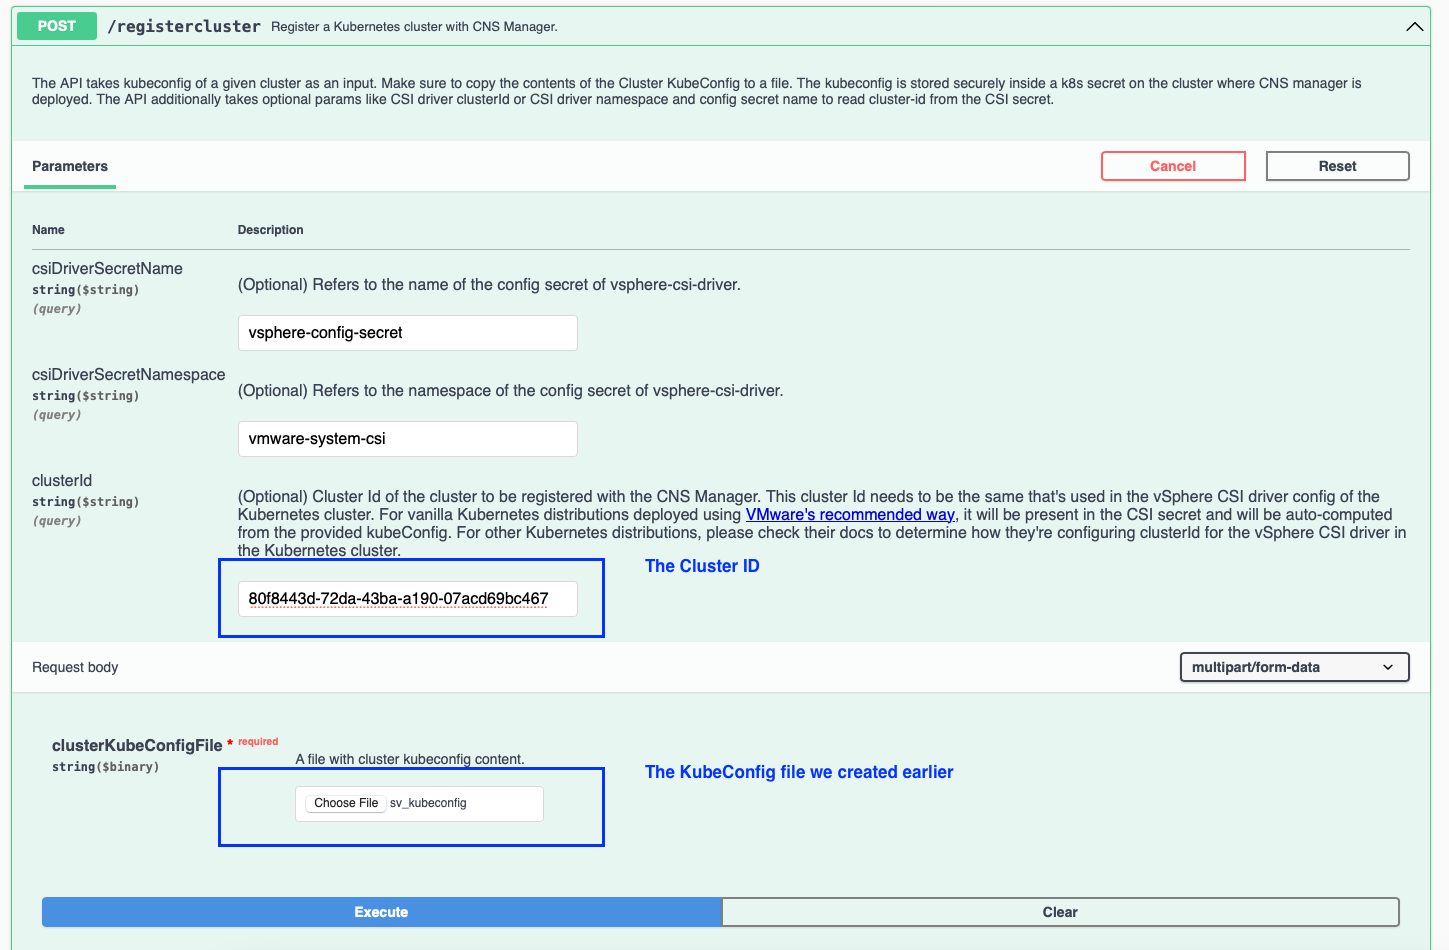
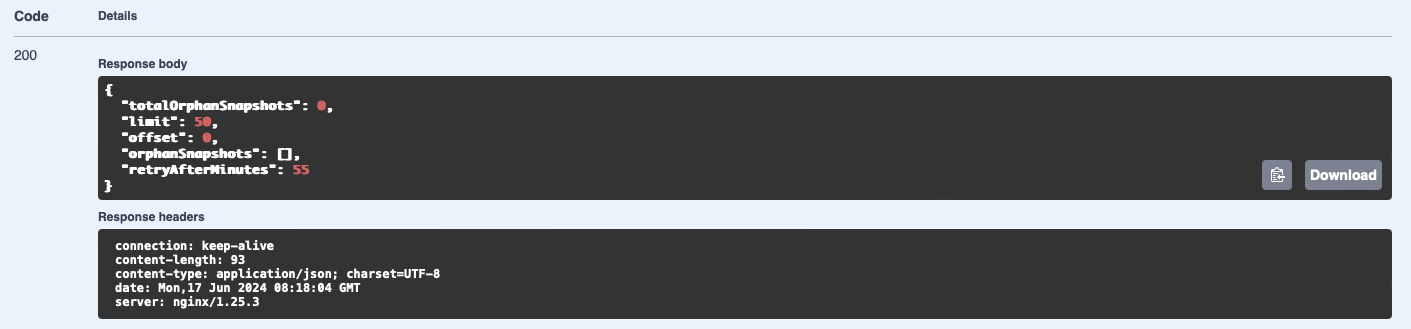
- This should return a 200 success!
You’re all set!
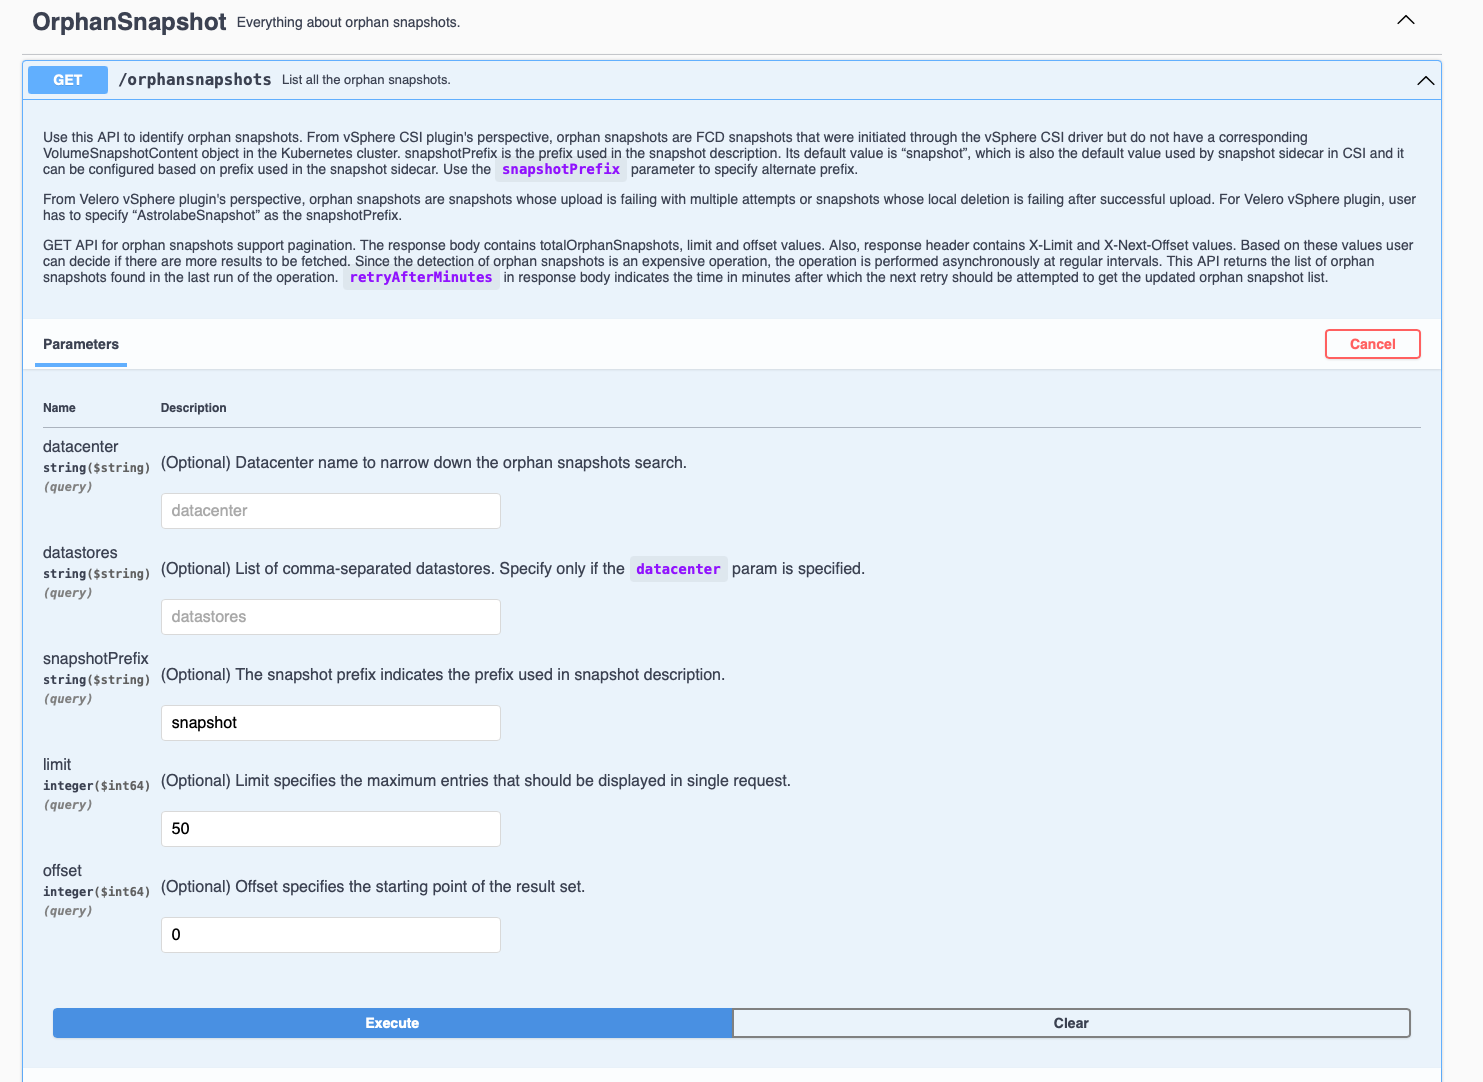
Listing Orphaned Volumes / Snapshots
This is easy! Now that our CNS – Self Service Manager Solution is deployed and our TKC is added, we can list all the Orphaned Volumes / Snapshots in our Environment!
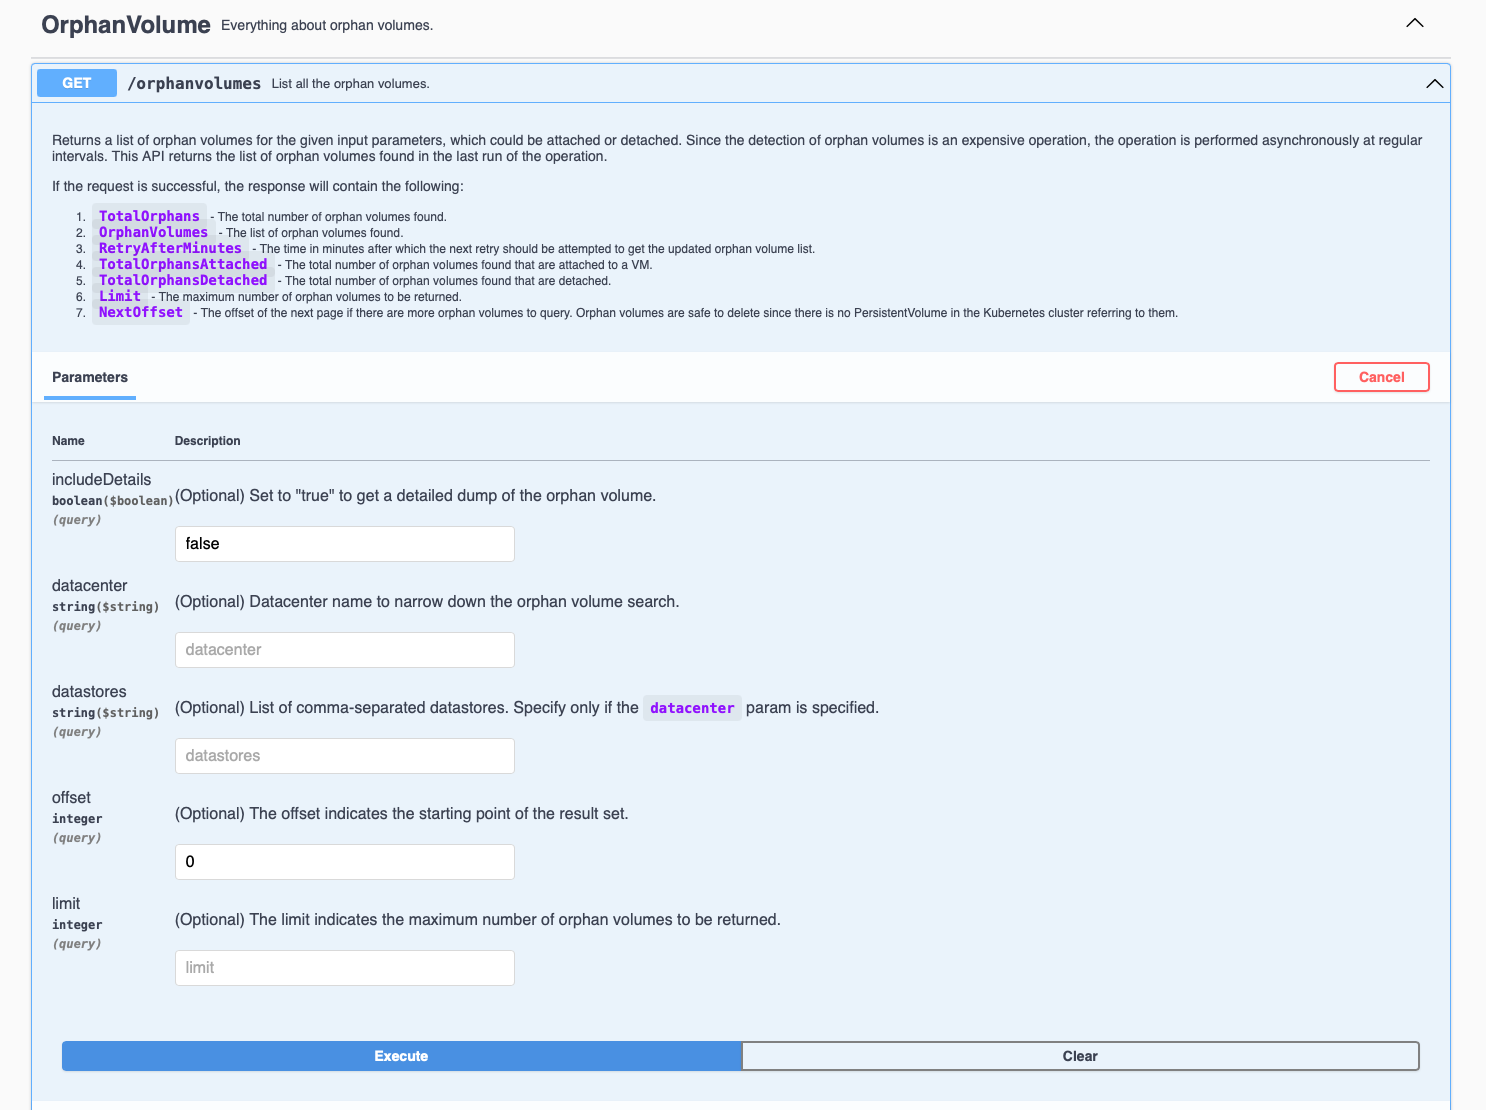
- Browse to the Swagger UI website:
http://<tkc_woker_node_or_LB_IP>:30008/ui/
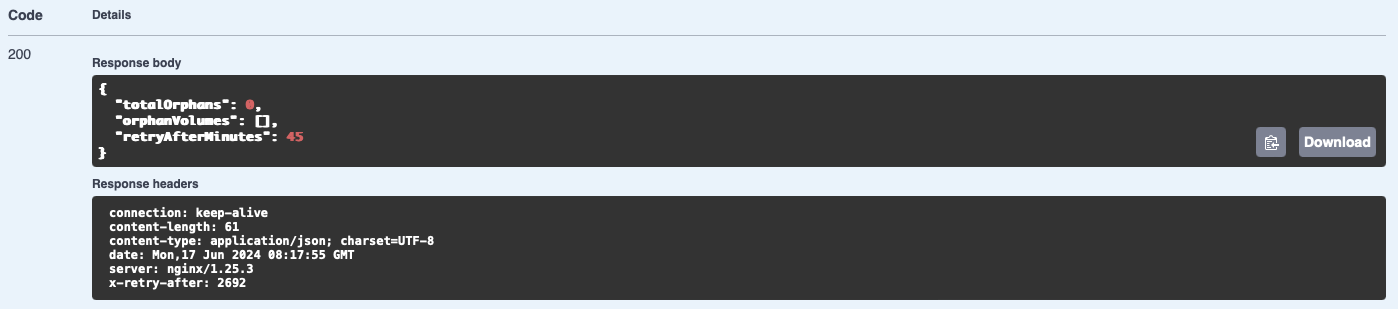
(Using Postman or Curl? The Backend API Calls themselves are accessible through the ‘/1.0.0/’ suffix; example: http://<tkc_woker_node_or_LB_IP>:30008/1.0.0) - List the Orphaned Volumes by executing the API call ‘GET /orphanvolumes’:
- List the Orphaned Snapshots by executing the API call ‘GET /orphansnapshots’:
- (Optional) Delete the Orphaned Volumes / Snapshots by executing their respective API call:
- DELETE /orphanvolumes
- DELETE /orphansnapshots
Be cautious!
Hope it helps! 🙂
